Hello again! This week on the Follr Blog we’re going to be taking a look at another exciting feature for your Community: Changing your Theme.
One great thing about Follr is that you can really make your Community page your own.. you can let your creative side out and design to your heart’s content!
Let’s take a look at how you can change the look and feel of your Community page.
First log in to www.follr.com and create a Community page if you haven’t already done so.
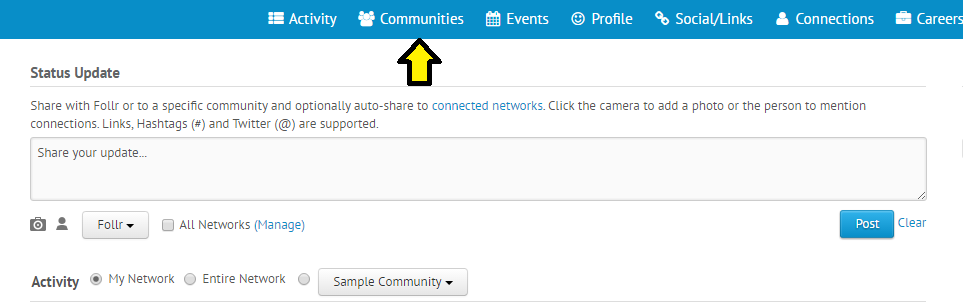
Then click on “Communities” at the top and then the Pencil icon or the “Administration” link next to the Community you wish to update:
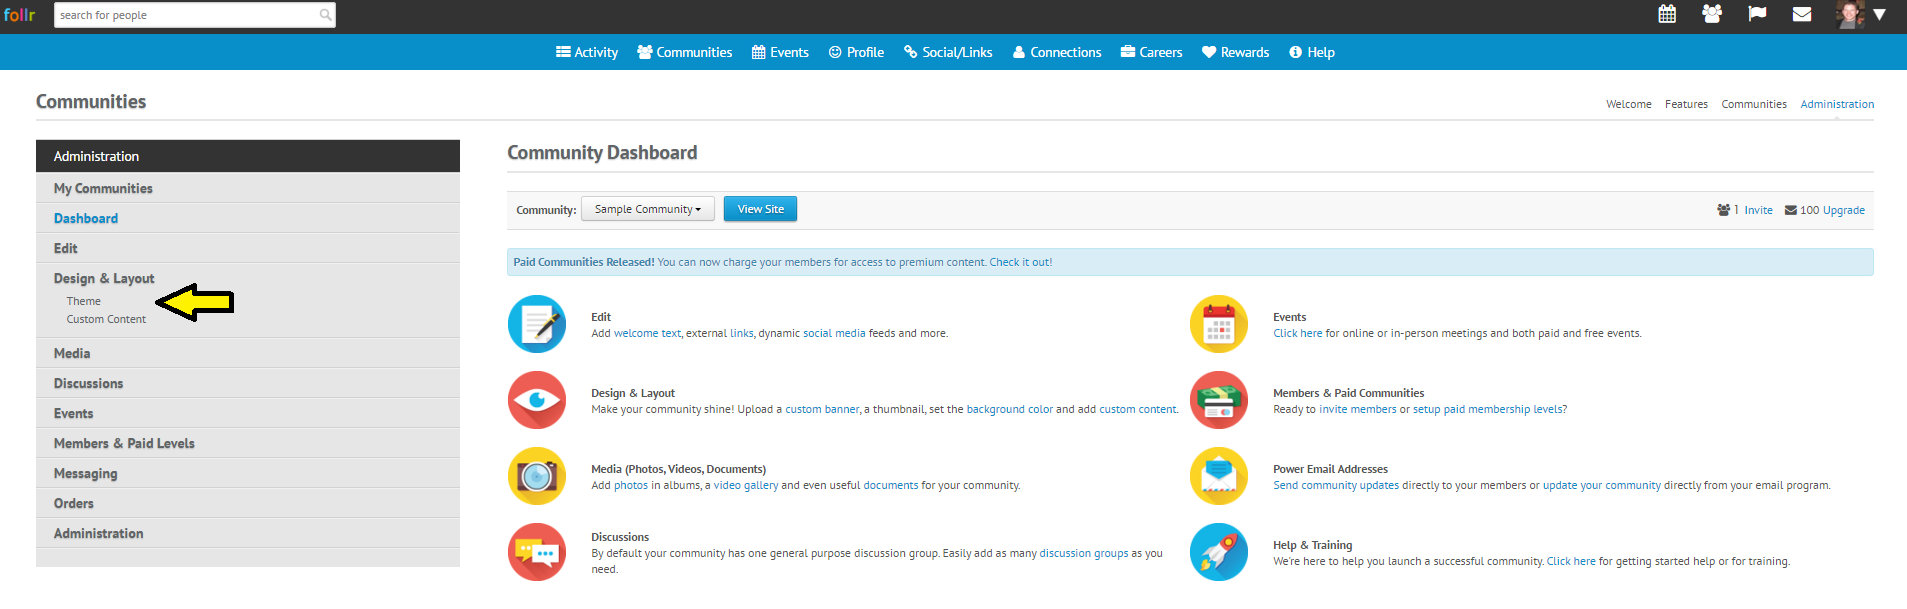
Good work! Next click on “Design & Layout” on the left-side navigation and under that click on “Theme”:
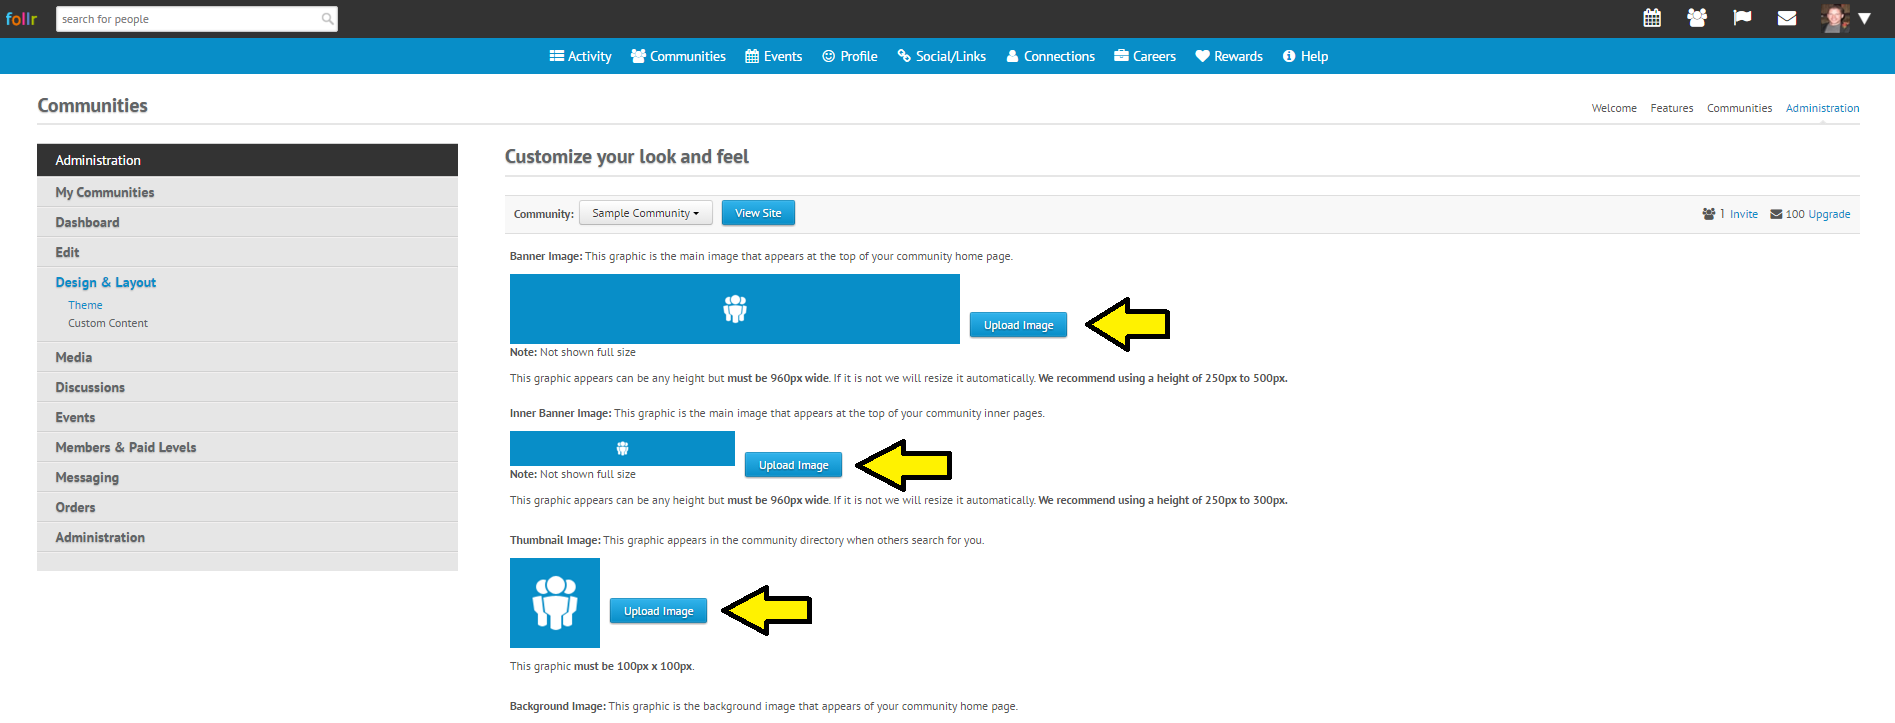
Next you can upload images to change the Banner, the Inner Banner and the Thumbnail image of your Community page:
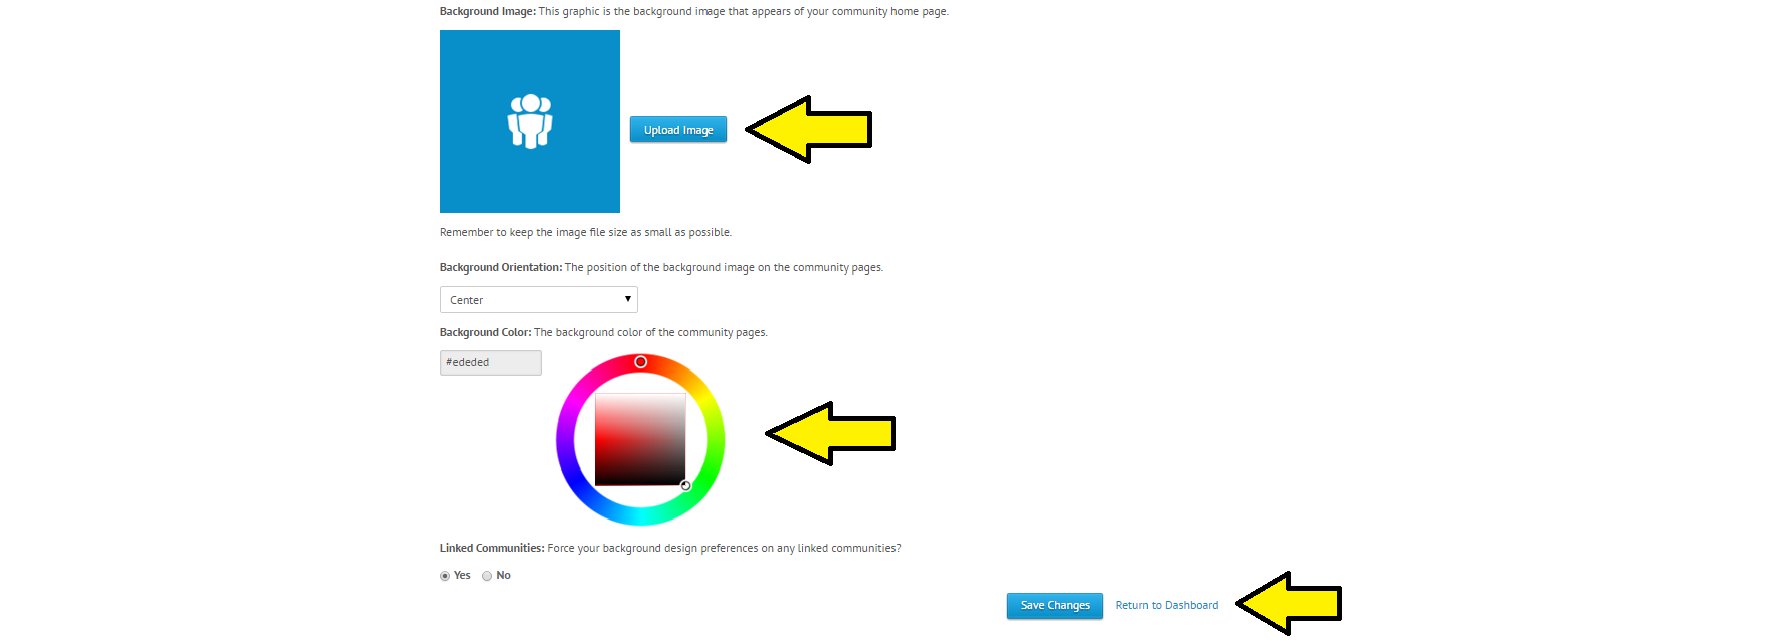
Now for the really cool part! Keep going on that page to change the Background Image and Background Color of your page:
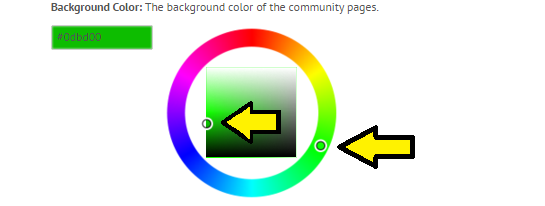
Here’s a close-up of the color wheel you can use to change the Background Color. Use your mouse to click, hold and drag the small white circle around the outer color wheel to update the color square in the middle. Then do the same with the small white circle in the color square to choose the color you want. You’ll see the box at left update with your chosen color.
Then when you’re ready, click “Save Changes” at bottom. That’s it! You can then go to your Community page and see your awesome new design.
Keep coming back to the Follr Blog each week for an exciting new Community Feature you can use to improve and grow your Follr Community!
This week on the Follr Blog we’re going behind the scenes to look at creating Events for your Community!
Events are a fun way for you and your people to gather either digitally or in-person to share time and ideas.
To add an Event for your Community, simply log in at www.follr.com, then click on “Communities”: Then either click on “Administration” or the Pencil icon under “Actions”: (make sure to create a Community in Follr if you haven’t already done so! 🙂 )
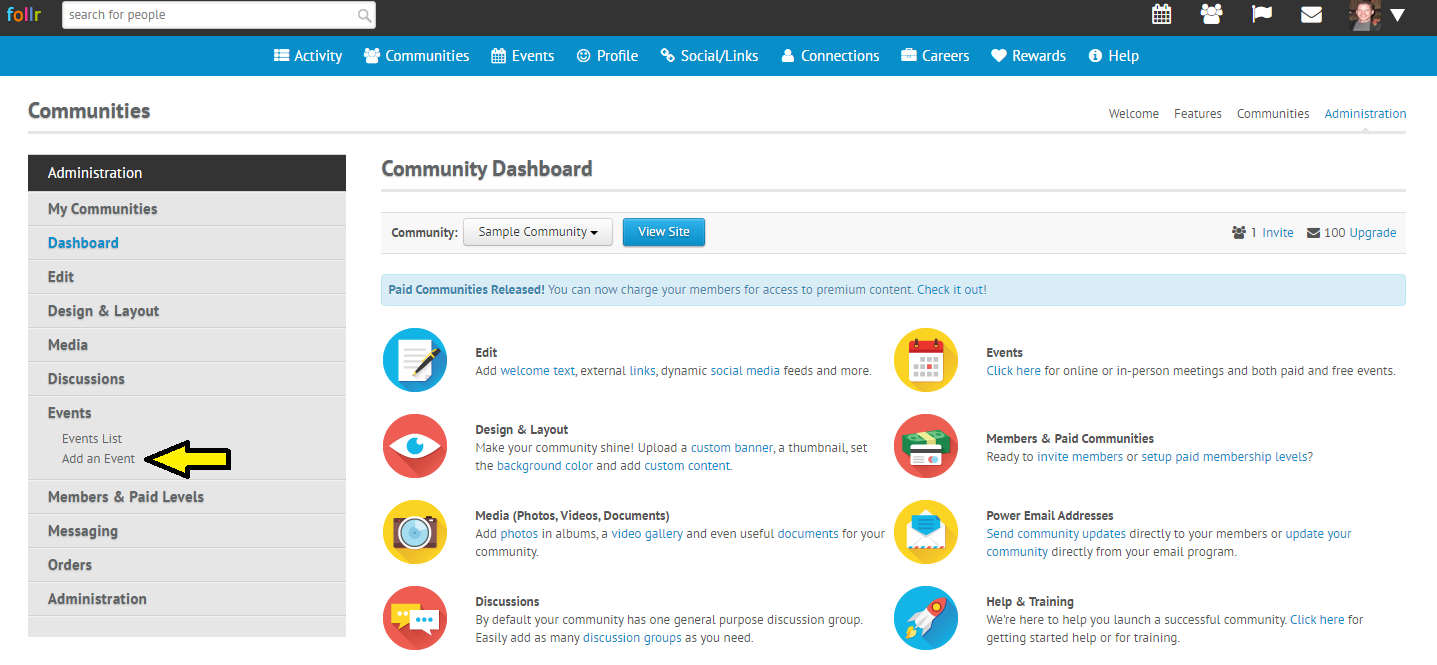
Then click on “Add an Event” under “Events”:
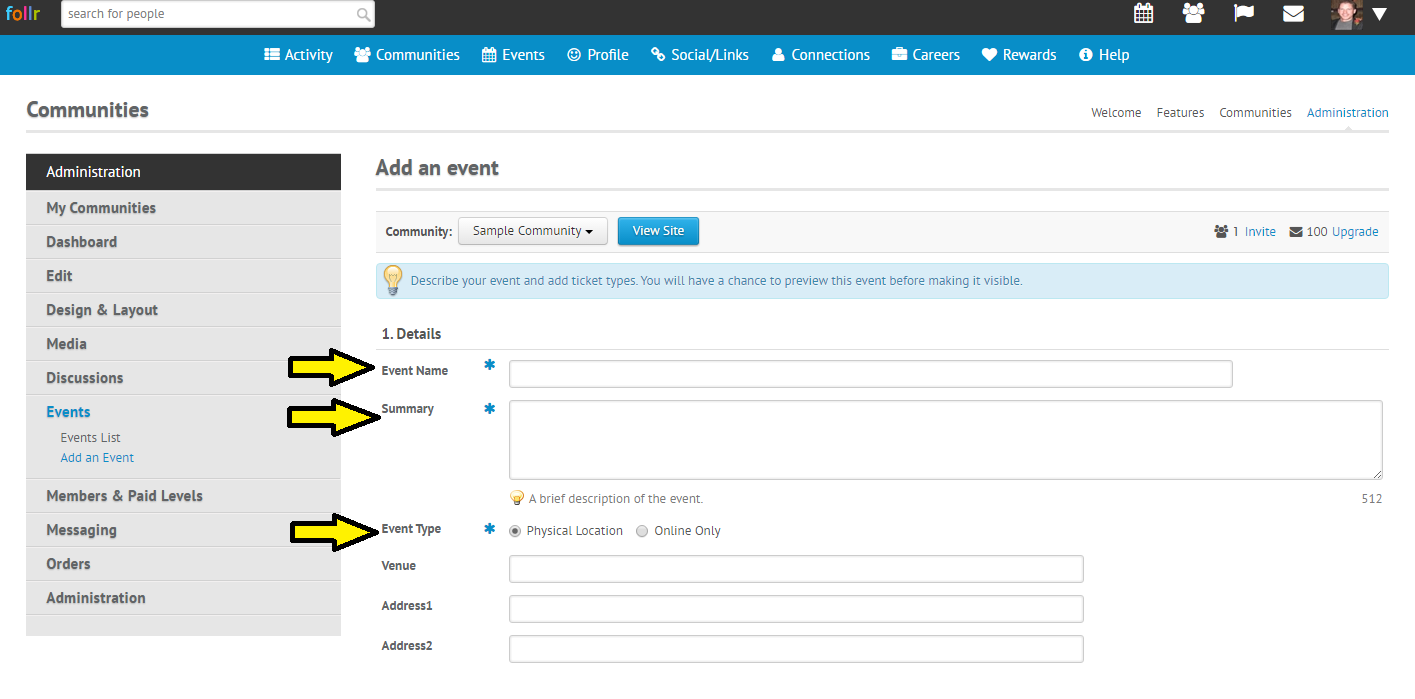
On the next page you’ll be able to start adding details of your Event, such as Event Name, a Summary and whether the Event is at a Physical Location or Online Only:
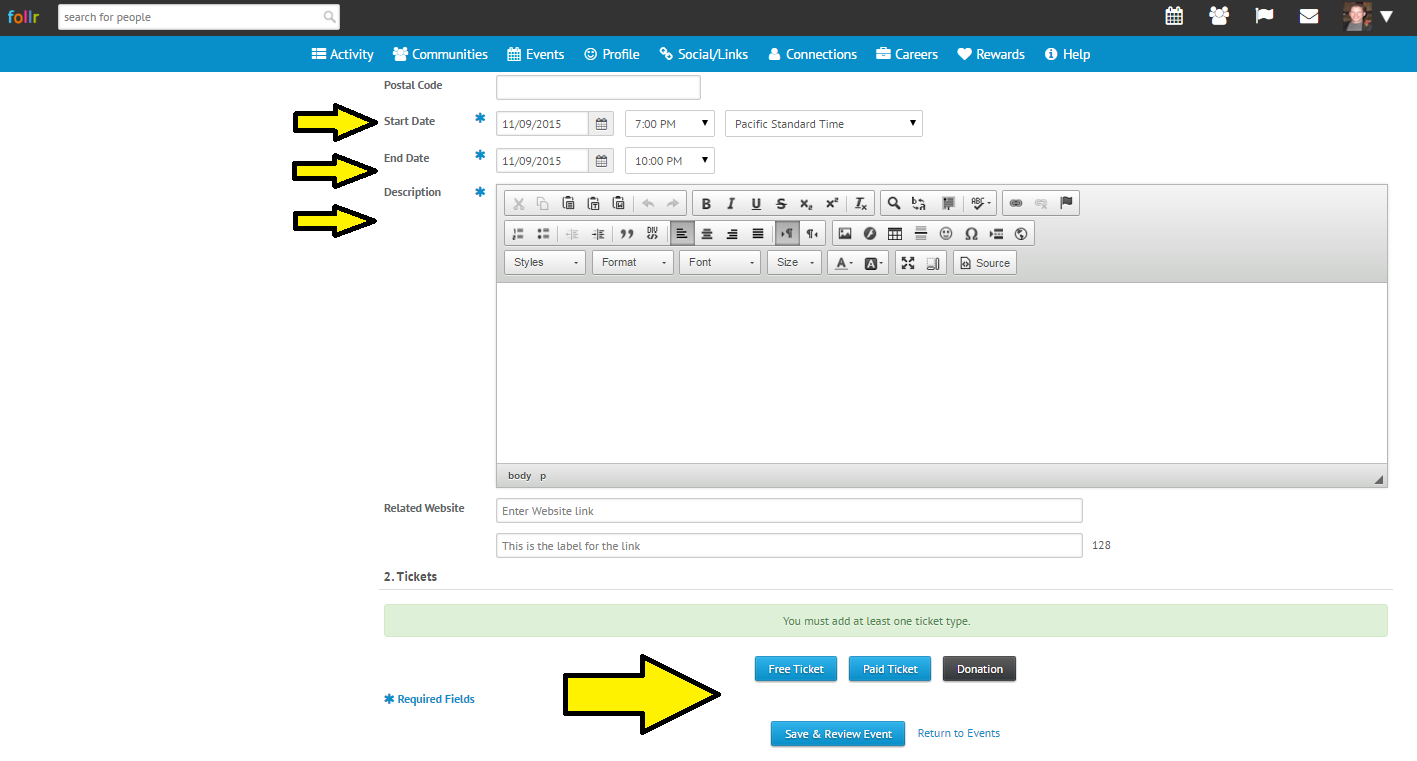
Now you’re ready to add a Start Time, End Time and a Description of your Event! Then at the bottom you’ll see an important part.. Tickets. Click on whether you’d like either a Free Ticket, Paid Ticket or Donation.
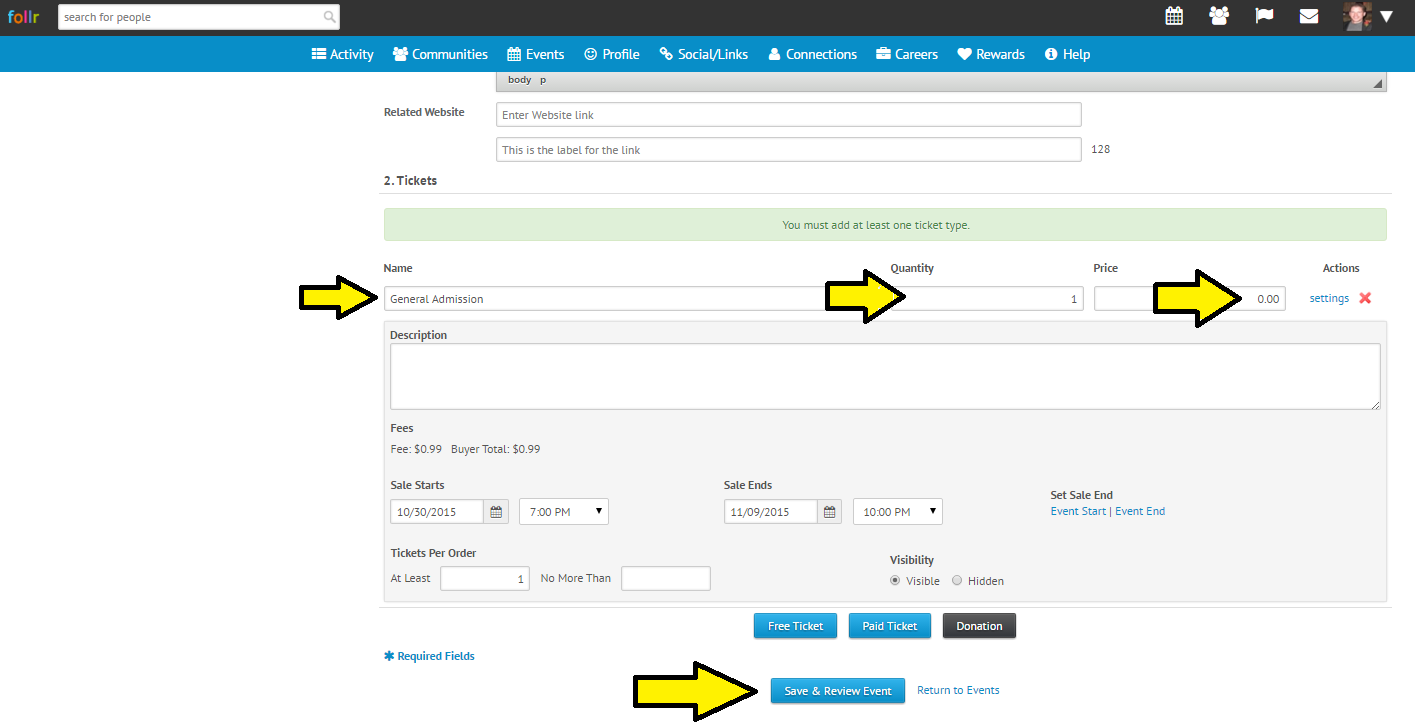
At this point a box will open so you can put in the details of your Tickets. Choose a Name, Quantity and Price (if Paid). You can add as many different types of Tickets as you’d like! (Just a quick note.. there is a small processing charge for Paid Tickets through Follr.)
Then click on “Save & Review Event”.
On the following page, make sure the details of your Event are correct, then click “Save Changes”.
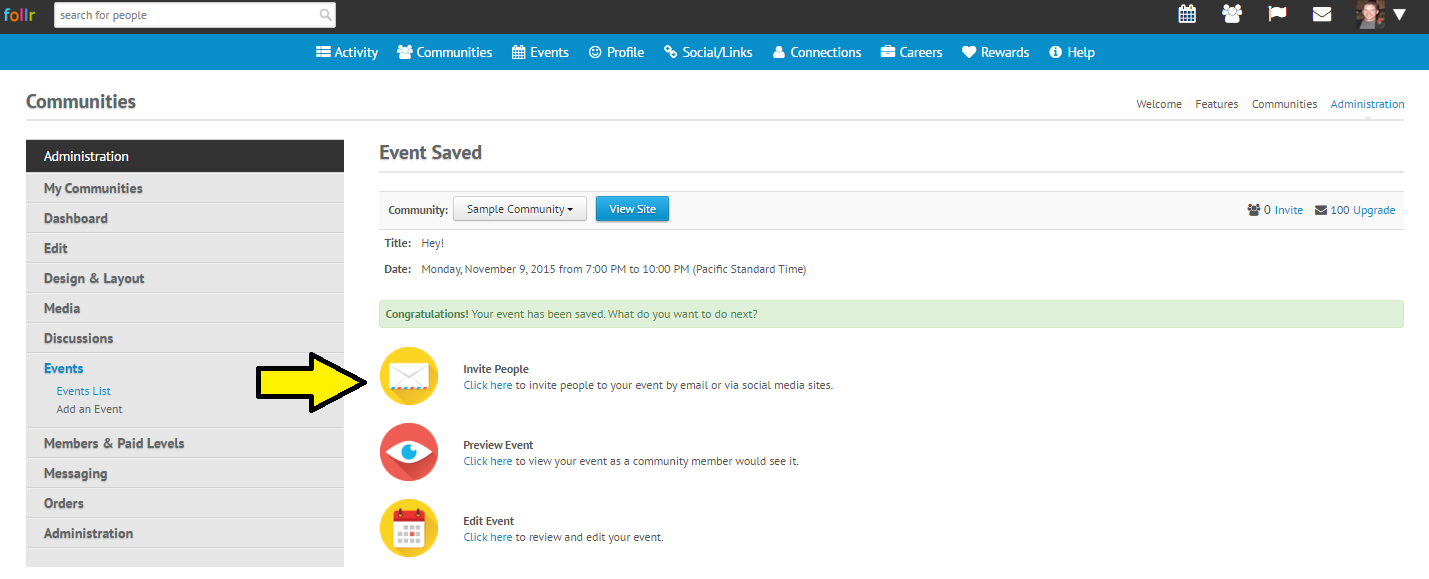
Congratulations! Your Event has been created. Just one last step.. telling people about your Event! Click on “Invite People” on the next page to invite via Social Media, Email or your growing Follr Community!
Have fun with your new Event!
Check back with us often here at the Follr Blog for many new exciting Community Features!